Visits by appointment only - please call 07976 531152 to arrange.
A Step by Step Guide to Candling Your Hatching Eggs
What to expect day by day.
Sarah Barratt
3 min read
So… You Want to Hatch Your Own Chicks?
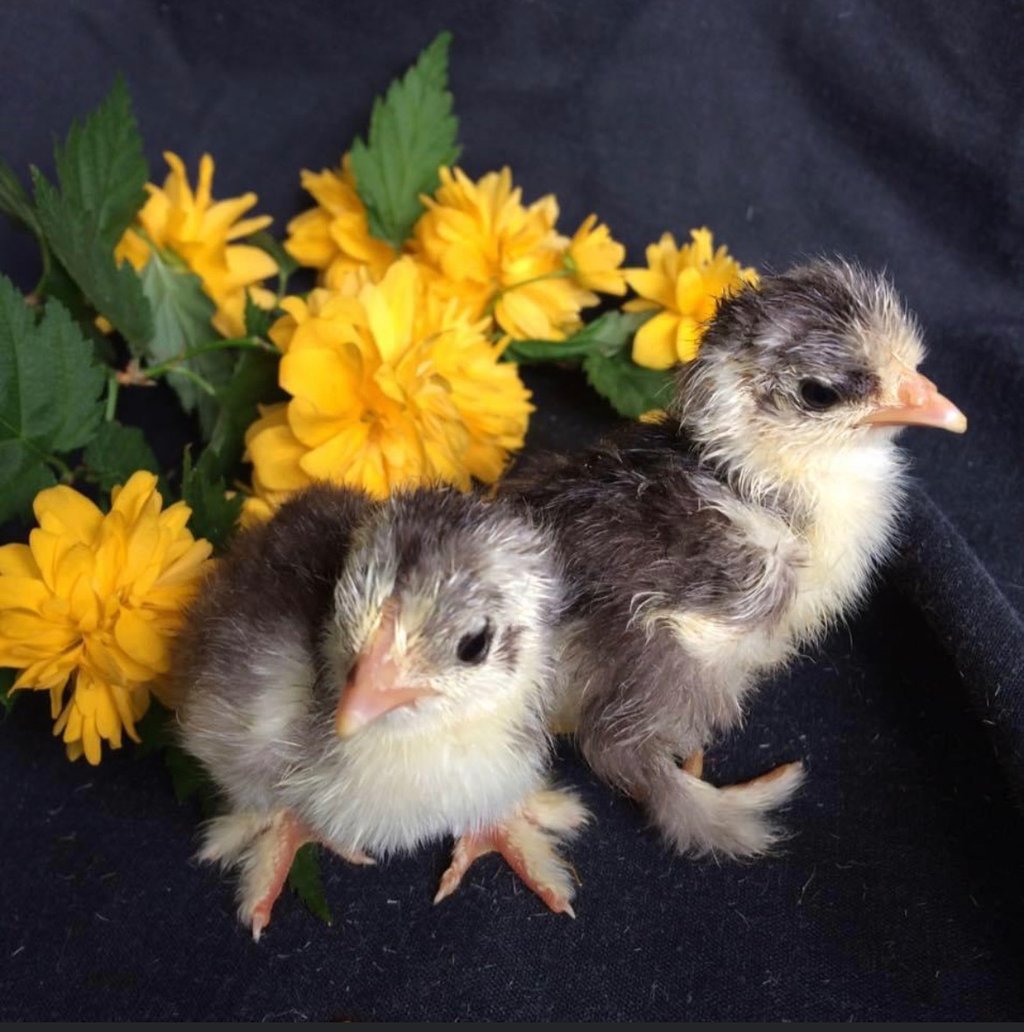
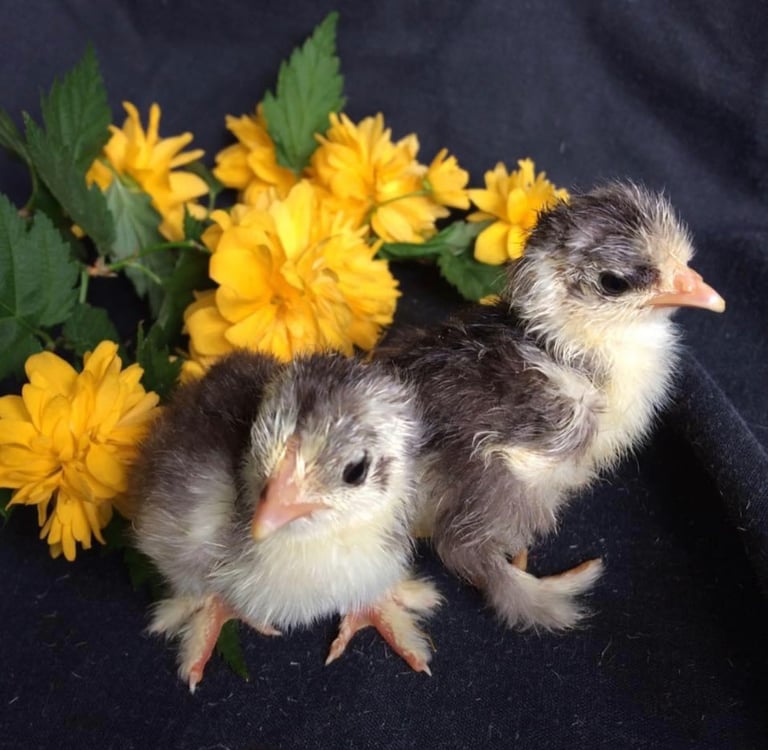
As a small chicken and quail breeder, I get a lot of messages that start with “I’ve never done this before, but I really want to try…” and I love that! There is nothing quite like hatch day. The quiet peeping from inside the shell. The first tiny crack. The moment a damp, wobbly chick flops out and blinks at the world.
If you’re buying hatching eggs from me, or thinking about it, here’s a down-to-earth guide to what you’ll actually see and what candling means during incubation.
Candling: Peeking Inside the Egg
Candling just means shining a bright light through the egg in a dark room so you can see what’s happening inside. And the best part is, after trying many fancy candlers, the best one I’ve ever used is the torch on my mobile phone. It’s bright, cool, and does the job perfectly.
Quick tip: Candle fast. Under 30 seconds per egg. You don’t want them cooling down while you admire them or overheating if your chosen method is one that creates heat.
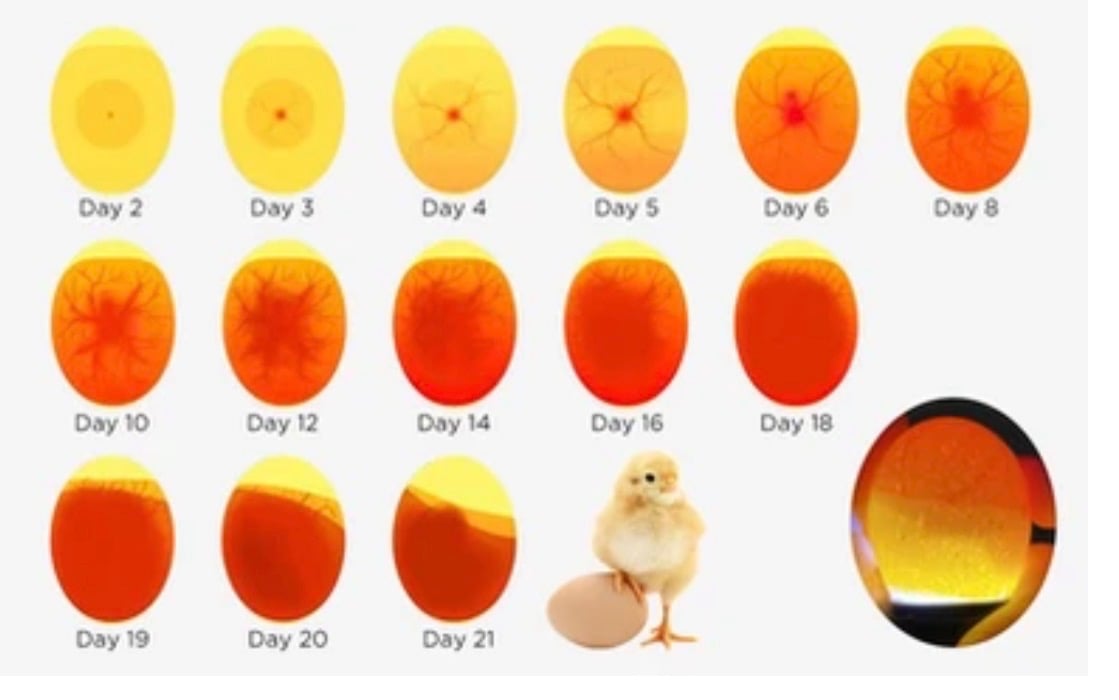
Days 0–3: Not Much to See (And That’s Okay)
At first, the egg mostly looks clear with no veins. You might notice:
A faint shadow from the yolk.
Maybe a little movement if you tilt it.
Days 4–7: The “Spider Vein” Stage (My Favourite)
This is when it starts to feel magical. If you see that web of veins, you’ll know things are going well.
A healthy egg will show:
Tiny red veins branching out like a spider web.
A small dark spot (the embryo).
A neat little air cell at the round end.
Things that aren’t so good:
Completely clear egg (likely infertile).
A red ring inside the shell (early loss).
An air cell that sloshes around or looks bubbly - that can mean it detached during shipping, and those rarely hatch.
If you’re ever unsure, take a photo and send it. I’m always happy to have a look.
Days 8–14: Now We’re Growing
By this point, the egg looks much darker. You’ll see:
A large dark mass.
Thicker veins.
Sometimes movement if you gently tilt it.
An air cell that’s slowly getting bigger.
That growing air cell is important. It’s the chick’s first breath space before hatch. If nothing has changed since the last time you candled, or the egg looks cloudy or smells odd, it’s best to remove it.
Days 15–18: Almost There
Now the egg is mostly dark inside. You should see:
A big, clear air cell.
Maybe the occasional shadow shift.
After day 18 for chickens (day 15 for quail), I stop candling unless there’s a real reason. At this point, less handling is better.
Final Thoughts...
Hatching your own chicks isn’t just about getting the temperature and humidity right, it’s about being part of something quietly amazing. There’s a certain stillness that comes with incubation. For days, it feels like nothing is happening. You check the thermometer, rotate the eggs and you candle and squint at shadows. It’s slow, patient work.
And then suddenly… it isn’t. A tiny peep, a wobble in the shell, a crack that turns into a determined little beak working its way into the world.
Not every egg will hatch. Even with strong breeding stock, careful packing, and good incubation practices, nature still has the final say. That’s something every breeder learns sooner or later. But when you lift that incubator lid to find fluffy chicks blinking up at you, the waiting, the worrying, and the careful monitoring all feel worth it.
If you’re on the fence about trying your first hatch, take this as your sign. Start simple. Keep your temperatures steady. Don’t overthink it. And remember, you’re always welcome to reach out if you have questions along the way.
From my coop to yours, I hope your incubator is full of healthy veins, strong air cells, and plenty of peeping on hatch day. 🐣
Sarah x
© 2026. All rights reserved.
Contact
07976 531152
info@parksidepoultry.uk
Useful Links
Address
4 Croft Road, Aldershot, Hampshire. GU11 3HR